Introduction to 3D Clothing Design and Digital Fashion
Understanding how to design clothes digitally and virtually is becoming increasingly important as digital clothing design and virtual clothing design gain popularity in this era. Digital fashion has emerged as a trend in the last few years, with promising technology and a few headline-grabbing breakthroughs. However, COVID-19 has pushed us all into a digital world, making it a household term.
In 2018, the digital fashion label Carlings created a virtual collection that customers could "wear" by sending the company a photo, and the piece was digitally added to make it look like they were wearing it. These garments sold for an affordable £9-30.
On the other end of the scale, The Fabricant, another digital fashion label, made headlines when it sold a virtual gown for $9,500 in May 2019.
Gamers have been able to buy clothing for their online characters for a long time, but digital fashion became mainstream when Valentino and Marc Jacobs designed collections for Nintendo's hugely popular lockdown hit Animal Crossing in May 2020.
What Are the Advantages of Virtual 3D Clothing?

How to design clothes digitally and what are the benefits?
Digital fashion is not just a fad or a fun game, however. It has serious implications for the fashion world as a whole.
In the design stage, sampling clothes digitally means that different design options can be tried out with the click of a button; there’s no need to physically cut out and sew on five different collar shapes or to try seven different colorways when they can be changed digitally.

(Try out different design modulars easily. TG3D's Stylebook)
As you can imagine, this translates to far less waste in production - being on-demand.
Only final choices are made up into samples for fine-tuning, and customers are far less likely to return a product bought online when they have personally selected the details and already seen how it looks on their virtual avatar.
Many people may not even want to buy a physical product after all but stick with the digital version, avoiding the production process entirely.
It’s brilliant for both self-expression and inclusiveness since digital clothing can be any pattern, size or fit you might wish for.
What Do You Need to Prepare to Design Your Own Clothes Virtually?
Since you are creating the design virtually, the first thing you will need to do is digitize all the physical materials including the patterns and fabrics.
For those who start with paper patterns, you will need to first digitize your patterns into 2D files in DXF format.
For fabrics, use a fabric material scanner to transform your fabric swatches into 3D versions.
You can learn how to create digital clothing or how to make virtual clothing from our previous blog: A complete guide to creating/ using digital materials for 3D fashion design.
The patterns and the fabrics are the two basic materials that you will need when creating your 3D clothes.
Of course, the most important part is that you will need to have access to 3D fashion design software, such as TG3D Studio’s Scanatic™ DC Suite.
6 Steps to Design a 3D T-Shirt (Using Scanatic™ DC Suite as an Example)
Full Video Here: Fundamental Tutorial | Quick Guide to DC Suite
Before starting the procedure, first, you need to learn about how to design clothes digitally or virtually.
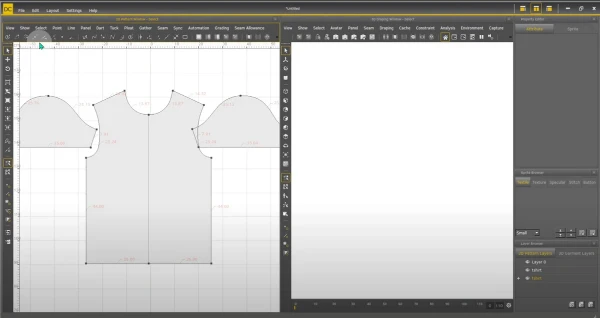
Step 1: Import DXF:
Import the 2D patterns with DXF format into the 3D fashion design software for 3D clothing designs.
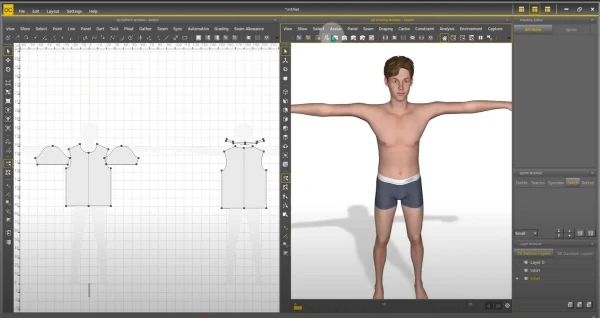
Step 2: Select a 3D Avatar:
Similar to the traditional fashion design process where you will need to have a fitting model to try on your clothes. You will also need to choose a virtual fitting model for your 3D clothes fitting.
Most 3D clothing design software will have a free default model for you to use.
You can also import your own 3D fitting model scanned from a 3D body scanner or the mobile 3D body scan app (launching soon!) which will better ensure the fit accuracy of the actual clothing.
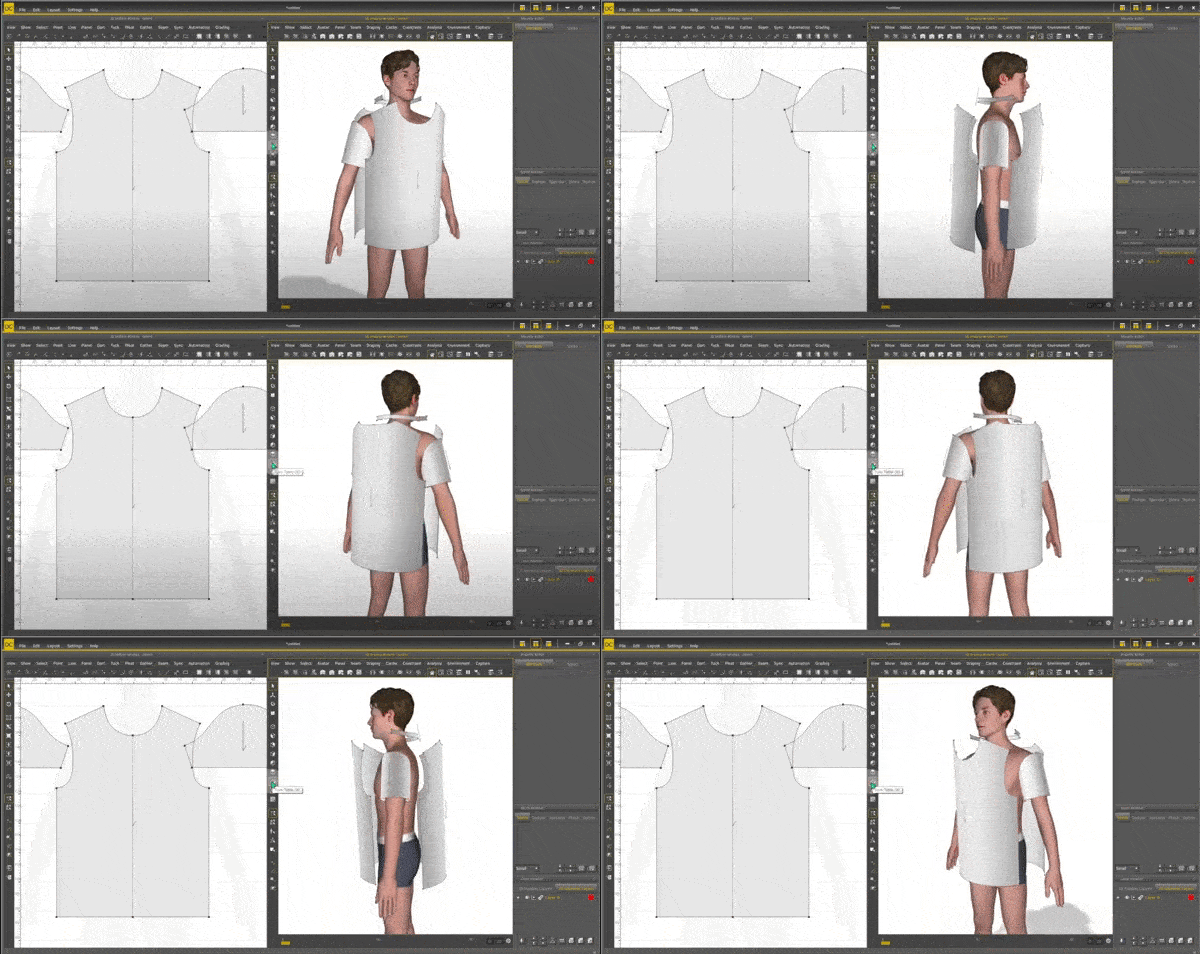
Step 3: Arrange the Patterns:
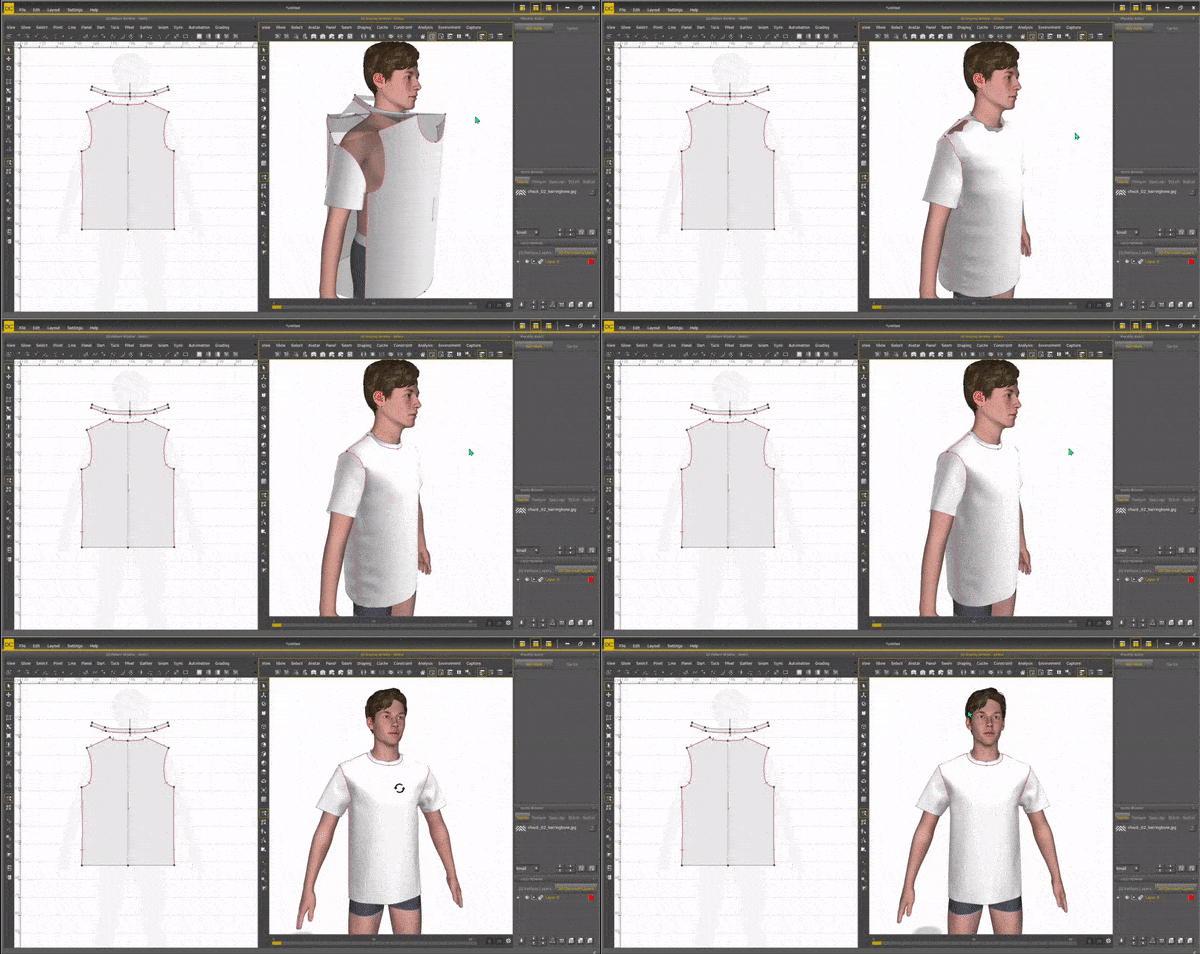
Sync the patterns into the 3D window and place the patterns around the 3D model.
If the patterns are arranged properly, it can also help you see the construction clearer when you are stitching the garment.
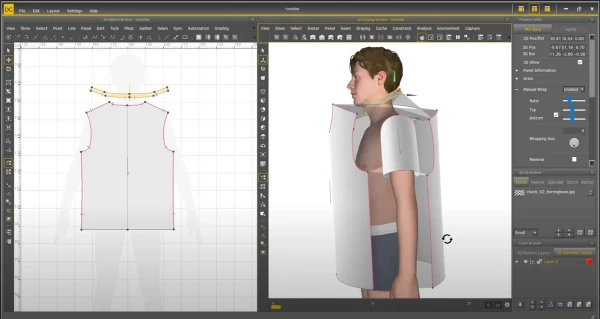
Step 4: Create Seam:
Define the correlation and create the seam of each pattern. It is similar to real sampling.
You will need to identify the connected lines on the patterns and sew them together.
This part is basically about setting the seam relation and information so the software knows which lines should be sewn with each other.
Step 5: Simulate the Clothing:
Simulate the patterns into clothing and review the shape/ drape of the clothes, making changes where necessary.
Step 6: Apply Fabrics and Trims:
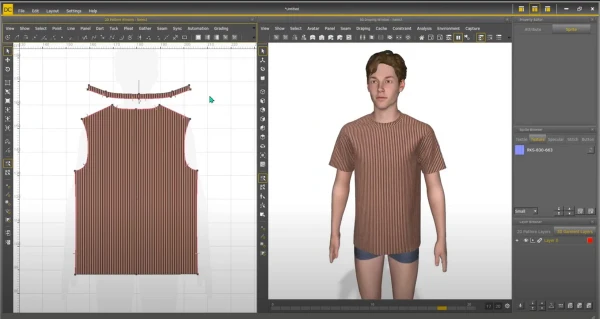
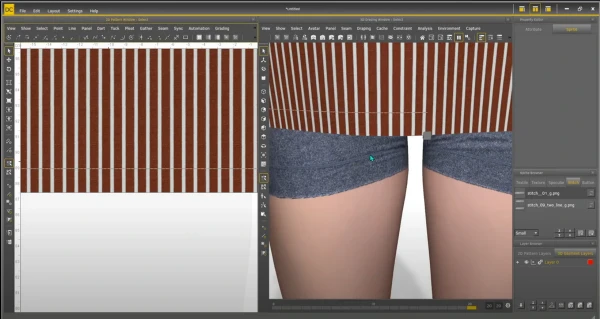
Apply the 3D fabrics that you prepared for your design and the default free trims provided with the 3D fashion design software.
For more details of how to design your own clothes virtually, please visit our latest Scanatic™ DC Suite training courses.
3D Clothing Design Tools for 3D Fashion Designers
Designing digitally allows designers to visualize their ideas and bring them to life before production. In the meantime, designers can benefit from increased efficiency, cost savings, and reduced waste. If you are interested in learning more about 3D fashion design tools, do not hesitate to contact us to explore the possibilities of this exciting technology.

